How to Create a Photo Project Budget (with Template)
Photography budgets only SEEM boring. In reality, they're amazing for providing clarity and predictability for any photo project.
Let's walk through budget essentials for stress-free photo projects, and how to customize a budget for conservation photography projects large or small.
How to get started building a budget for a photo project
Aaaahhh budgets. Not everyone's favorite task. But when it comes to conservation photography projects, they're essential.
Building a budget helps you out in a multitude of ways.
With a budget in place, you can:
- Avoid surprise costs
- Discover hidden tasks (such as applying for a permit or arranging travel logistics)
- Understand when you need to fundraise, and what kind of fundraising to do
- Impress (and reassure) important supporters or collaborators with how organized you are
- Apply for the right grants more quickly and easily
- Get a better handle on the timeline for your project
- And much more
Budgets aren't just for paid work or big projects. They're important even for passion projects or smaller local initiatives. They're important for short term projects and ongoing projects.
They're, well they’re just a great idea.
So, let's talk about how to put one together!
One quick note before diving in: What we're accomplishing right now is a budget specific to creating images and deliverables for a personal conservation photography project.
A budget will look different depending on what it is for and who is seeing it. We're covering all the basics you'll want to address in order to shoot and show off a fairly simple project.
Even though this is an example for a basic budget, it will help you form a foundational budget for larger, more complex, or more specific projects down the road.
What you need to build a photo project budget
To get started, there's a few things you need in front of you. Item numero uno is a spreadsheet. Whether your preference is paper or digital, get some grid lines in front of you so you can easily organize your line items.
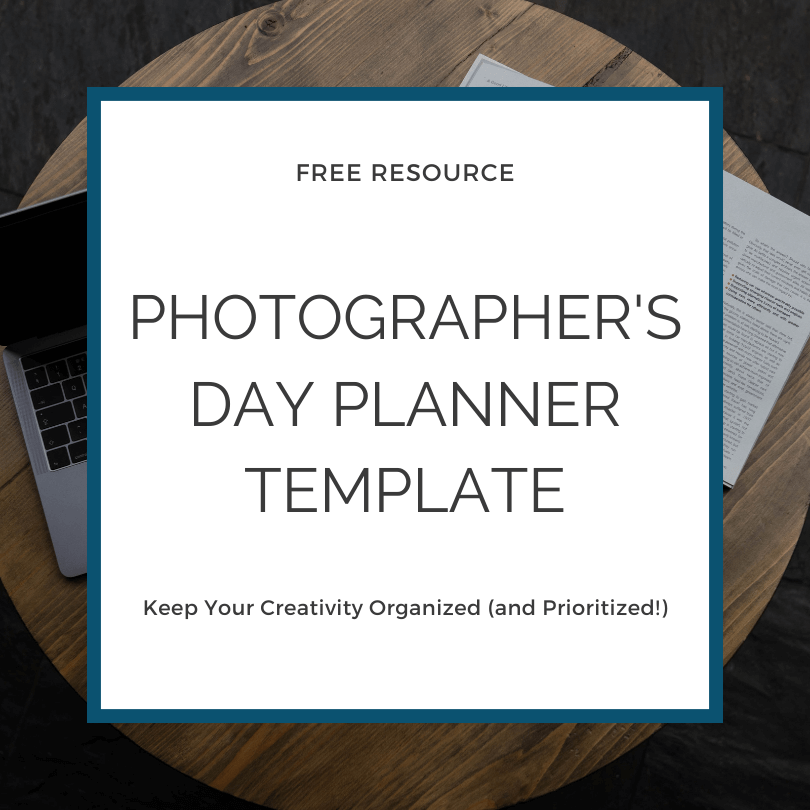
I'm all about making things extra easy for you, so I've built you a free template. Download the spreadsheet using the handy dandy form in this article to make it easy to get started.
Don't worry, I'll wait here for you while you grab that…
All set? Ok great. The other things you'll need in front of you are:
- A list of your project goals
- A list of your project deliverables
- A list of locations you want to shoot
- A list of the people you’re collaborating with
- A list of the photography equipment you want/need for this project
You can pull most of these lists from your Scope of Work and Work Breakdown documents.
Don’t have those built yet? No sweat. Check out these articles:
- How To Build A Scope Of Work For A Photo Assignment
- How To Create A Work Breakdown For A Photo Project
I provide downloadable templates for both the SOW and Work Breakdown within the articles to make writing these a piece of cake.
Our Example Conservation Photography Project
To break down the primary components of a budget, let’s set up an example scenario that is super common among conservation photographers.
Let's say we live near a gem of a wetland. A wonderful diversity of species is spotted year round, and migrating waterfowl show up in the fall. We spend 3-4 days a week at this wetland photographing the sunrise activity.
The wetland is overseen by the state’s DFW, but it is primarily cared for by a nonprofit 501(c)3 called Friends of the Wetland (FoW).
FoW has a small staff of three dedicated people, and most of their work in trail maintenance, invasive species removal, habitat restoration, and wildlife monitoring is accomplished by volunteers. The staff members put their all into the work, and make do on a shoe-string budget.
We know that not only is our enjoyment of nature photography made all the better by FoW, but the nonprofit also ensures the survival of the wetland, which is immensely important to the local ecology. We want to help.
We launch a project that will document the species diversity of the wetland, and our community’s enjoyment of this special place. During the course of two 3-day photo shoots, we’ll craft a portfolio of images that illustrates the wetland’s importance to our wildlife and to our community members.
The work will culminate in an exhibit at the state capitol building to bolster support for FoW, and raise funds that will allow FoW to renovate a wildlife observation deck at the wetland.
With this project – and our list of goals, deliverables, people, locations and equipment – ready to roll, let’s build a budget so we start our work with eyes wide open about how much it’ll cost us to pull this off.
Parts of a Photo Project Budget
This budget covers all the basics that we’ll need for our example project. Depending on your own actual project and what you want to accomplish, your budget may have fewer fields, or additional fields. The downloadable template I provide in this article can be endlessly customized to your projects. The numbers I put in there are relatively arbitrary. They're just placeholder numbers. So please don't use them as a reference for your own rates or estimates.
To note: In my own budgeting I add a contingency fund for each section of a budget. However, you might want to have just one single line for a contingency fund. Either way, factor in an extra 10% or so (either 10% of the total cost of that section, or 10% of the total cost of the project) as a contingency fund to cover unexpected costs. And trust me, there will be unexpected costs.
1. Photo equipment rental
The first goal of a photography project is getting images, of course. Take a gander at your project goals. Think about your shot list. What equipment beyond the gear you own are you going to need to pull off the images you want to create? Are you going to need special lenses, triggers, a drone?
All the needed equipment should go on a “to rent” list. Then, create a line item in your budget for each piece of equipment, and add in the cost of renting that piece of equipment.
Let’s say for our project we need to rent a 600mm and a 16-35mm lens, plus a remote trigger set to get the portraits we have in mind.
That’s three line items, each with their own cost.
Enter a fourth line item for a contingency fund, and add in an extra amount (about 10% of your total rental costs) to cover any unexpected fees or insurance add-ons.
2. Custom equipment
As every photographer knows, equipment needs don’t stop at the camera gear. For a wetland shoot, we might want a pop-up blind, or maybe we need to DIY our own floating blind.
Each piece of additional equipment – down to the nuts and bolts used in building that floating blind – get a line item. Research the costs of each piece, and enter that amount.
Again, add a line for a contingency fund – about 10% of the total expected costs should do it.
3. Labor
We need to include covering our own time that we devote to this project. I recognize this feels odd. Aren't we just trying to do some good in the ‘hood? Well, yes.
A lot of people, especially when working on a passion project, feel guilty about taking payment for their contribution. You may be volunteering for your conservation photography project, but if you’re doing any fundraising to cover costs – either crowd-sourced, securing sponsorships, or applying for grants – you definitely want to factor in the cost of your labor.
As conservation photographers, our labor is of value, and is worth investing in.
Plus, often those investing in a project want to see the photographer compensated for their work. It adds a sense of professionalism and heightened level of quality to the whole project.
So. Don’t. Feel. Guilty.
And don’t skip this section, especially if you’re fundraising to cover costs and can factor this line item into a goal amount.
For the labor section, I include:
- An administrative day rate for the time spent at the computer planning out the project, coordinating shoots, making connections to get access to areas, filing for permits and so on
- A photography day rate for the days I’m actively shooting. This includes the time spent shooting as well as the time spent editing and processing images
- A deliverables creation day rate for the time spent at the computer designing, editing, and printing deliverables
When you create your work breakdown, you’ll figure out how much time you’ll need for each of these line items.
For our example project, let’s say our work breakdown specifies:
- 4 total administrative days spread out over the project
- 6 total shoot days for two 3-day shoots
- 4 total deliverables creation days to make prints, caption cards, fliers, and donation sheets for the exhibit
Decide on a rate that feels fair to you, and add that in for each line item.
4. Photo shoots
Next, we figure out what costs we will incur during our actual shoots. For our example project, our shoot cost are fairly minimal. We will add in line items for parking fees, gas or mileage rates, and meals.
However, for a project that takes you on the road or into the backcountry for a shoot, you might have a list that also includes:
- Assistant day rate
- Guide day rate
- Lodging
- Permits
Add in anything you’ll have to cover during a shoot, and repeat this if you're doing multiple shoots.
In our example, we’re doing two 3-day shoots. So our budget will have a section for Shoot A and all its costs, and a section for Shoot B and all its costs.
This makes it easier to track costs specific to each shoot, especially if the shoots have different tasks or goals that incur different costs.
For example, Shoot A might be done with just us and our gear, while Shoot B’s image goals requires our hiring a boat driver, and renting time at an existing photo blind. So, Shoot A’s line items will then be different from Shoot B’s line items.
See what I mean about keeping ‘em separate to make it easier in the long run?
And don’t forget that all-important contingency fund for both shoots!
5. Photo project deliverables and distribution
Last but certainly not least is the section for our deliverables. This where all the “artifacts” of your work go – the actual physical things that come out of your project – plus the costs of delivering said deliverables.
In our example, we’re doing an exhibit set up in a hallway at our state’s capitol building. So our costs include:
- 15 Prints mounted on foam core
- 15 Display stands
- Card stock for the caption cards
- Fliers to advertise the event around the city
- Brochures with donation sheets for people to complete at the exhibit
(The template budget I provide has example line items for other deliverables, such as a website, printed books to hand out to decision-makers, a multimedia production and so on. There are all kinds of creative deliverables that are amazingly effective for conservation photography projects…)
And there’s the cost of getting this exhibit up. Include things like:
- Gas/mileage
- Overnight lodging
- Meals
- Parking fees
One last thing. Can you guess it?
Yep – contingency fund!!
When you’re done with these sections, add up the total. Then, round up to get your actual estimated budget total. Always round up, because nothing ever comes out exact, and it's better to budget high and come out under-budget than the other way around.
Voila! Your budget is done.
When you take the time to build a budget, you save yourself time and headaches in the long run. And really, it doesn’t take much time. Figure 2-3 hours of your day for making lists and researching costs… it’s not much of a time investment for ensuring something as hugely important as the success of your project.
Anyone who is going to sponsor your project will want to see where their donation is going. Any grant you apply for is going to want this breakdown. And even FoW themselves might want to see the budget so they know exactly what you have in mind for the project.
In other words, this is so worth it!
Resources Mentioned
Episode 025: 5 Essential Elements Of A Conservation Photography Project Budget (Free Template)
Shownotes: ConservationVisuals.com/25
(Digitally transcribed, please forgive any typos)
________________
Jaymi Heimbuch:
Today's episode is about budgets. I know, I know they are not everyone's favorite task, but when it comes to photography projects, they are essential. Building a budget for a photo project helps you out in a multitude of ways. With a budget in place, you can avoid surprise costs. You can discover hidden tasks such as applying for a permit or arranging travel logistics. You can understand when you need to fundraise and what kind of fundraising to do in order to pull off your project. You can impress or reassure important supporters or collaborators because you know exactly what your numbers are. You can apply for the right grants more quickly and more easily because you've already done the hard work of putting together a budget and budgets are usually a requirement in a grant application. You can even get a better handle on the timeline for your project.
You can do so much thanks to a well-planned budget. And budgets are not just for paid work or big projects. They're important even for passion projects or smaller local initiatives. They're important for short term projects or ongoing projects. They're, they're just a great idea. So in this episode I want to walk you through exactly how to plan a budget for a photo project of any size.
We're going to talk about what kind of costs you consider and even how to put together your spreadsheet and I am not even going to make you start from scratch. I have built you a downloadable budget template which you can use to begin to design your own budget right away. It takes a lot of the legwork out of even beginning this task. I want to make it as easy for you as possible because I really believe in how important a budget is for any size project. So to download your budget template, just go to JaymiH.com/25 The number 25 for this episode, and you can grab that. It is a Google sheet so you can easily make a copy, put it in your Google drive and away you go. And away we go into this episode.
Welcome to Impact the Conservation Photography Podcast. I'm your host, Jaymi Heimbuch, and if you are a visual storyteller with a love for all things wild then you're in the right place. From conservation to creativity, from business to marketing, and everything in between, this podcast is for you the conservation visual storyteller who is ready to make an impact. Let's dive in.
Hello and welcome to another exciting episode of Impact. Now before we in, I want to let you know that this episode is sponsored by Conservation Photography Courses. This is the only online education platform designed specifically for conservation visual storytellers and does exciting times because enrollment is opening soon for the digital course. Conservation Photography 101. This is my signature program for helping you master how to uncover, photograph and pitch a powerful conservation story.
Now, whether you are brand new to the scene of conservation photography or you have some experience but you want to take your skills to the next level, you likely already know that you need a systematic approach to discovering and photographing fresh stories and a strategic way of getting them into the hands of editors. And that's what my signature online course offers. It is a roadmap for finding a compelling story, crafting storytelling images and writing an eye catching pitch to send a publications enrollment for this in depth educational opportunity is starting soon, so head over to ConservationPhotographyCourses.com to hop on the wait list, that's ConservationPhotographyCourses.com and when you join the waitlist you will be first to know when enrollment opens. All right, let's dig into this episode
To get started on building a budget, there's a few things that you need to have in front of you, and the first of course is a spreadsheet. Now remember you can download a budget template at JaymiH.com/25 But whether your preferences using paper or going digital, you really need to have some grid lines in front of you so that you can easily organize all of the line items in your budget. And once you have that, you also want to have a list of your project goals. So what do you really want to accomplish overall with your project? You also want to have a list of your project deliverables and that's exactly what you are going to create with your project. You want to have a list of the locations where you want to shoot because that's going to help you figure out travel logistics and a list of the people that you're collaborating with.
You'll also want a list of the photography equipment that you want or need for this project cause that's going to let you know what you need to buy or rent so you can pull most of these lists from your scope of work and your work breakdown for your project. If you have no idea what I'm talking about when I say that, head over to episodes 15 and 16. In 15 I tell you exactly how to build a scope of work. In 16 I tell you exactly how to create a work breakdown and these are two really important tools to do for every project and they help you out immensely in building your budget. So if you don't have these two items pulled together yet, no problem. Just head over to episode 15 and 16 I even provide downloadable templates for both of these things inside of those episodes.
If you don't have them built out yet and you're really eager to dive into this budget, then Hey, you already know the lists that you need, goals, deliverables, where you want to shoot, who you're collaborating with and the equipment that you need. Now once you have all of those together, you are ready to start figuring out some numbers.
Now to break down the primary components of a budget, let's go ahead and set up an example scenario and this will be one that is really common among conservation photographers and that'll help you kind of see in this example exactly how to put numbers together and it'll be easier for you to put numbers down for your own project. So let's say that we live near this total gem of a wetland and there's an amazing diversity of species that is spotted year round at this wetland as well as migrating waterfowl that show up in the fall. There's probably three to four days a week that we spend at this wetland photographing all of the sunrise activity.
And this wetland is overseen by the state's department of fish and wildlife, but it's primarily cared for by a nonprofit, which would be like a 501(c)3 and we'll just call it friends of the wetland. Now, friends of the wetland has a small staff of three dedicated people and most of their work goes into trail maintenance, invasive species removal, habitat restoration, and there's wildlife monitoring that's accomplished by volunteers. Now the staff members, they put their all into the work and they make do on just a shoestring of a budget. We know that not only has our enjoyment of this nature, photography location made all the better by friends of the wetland, but the nonprofit also ensures the survival of the wetland, which is really important to local ecology.
So we want to help, we want to launch a project that will document the species diversity of the wetland and our community's enjoyment of this special place. And during the course of two three day photo shoots, we will craft a portfolio of images that illustrates the wetlands importance to our wildlife and to our community members. That work is going to culminate in an exhibit at the state Capitol building and that's going to bolster support for friends of the wetland and raise funds that will allow friends of the wetland to renovate a wildlife observation deck on that wetland. It would be really amazing to have this whole new area where people from the community can go and watch the wildlife. Now with this project and our list of the goals, people, locations and equipment, we're ready to roll, so let's build a budget so we can start our work with eyes wide open about how much it's going to cost us to pull off the shoot, the exhibit, the fundraiser.
Now our budget for our example project, it's going to cover all of the basics that we need for this example and depending on your own actual project and what you want to accomplish, your budget might have fewer line items or more line items. The downloadable template that I provide for you at JaymiH.com/25 that can be endlessly customized to your projects. Now the numbers that I put in there are totally arbitrary. They're just placeholder numbers, so please don't use them for a reference for your own rates or estimates, but it's really helpful to help you really dig into how you will customize that for your own project by digging into the line items. That would be really useful for this example.
So the first line item is equipment rental. Now the goal of a photography project is getting images of course, right? So you take a Gander at your project goals and you think about your shot list and what equipment are you going to need beyond the gear that you already own to pull off the images that you want to create. Are you going to need special lenses or triggers or a drone? All of those equipment items, they need to go on a to rent list. And then inside of your budget you'll create a line item in your budget for each piece of equipment and you'll add in the cost of renting that piece of equipment.
So let's say for our project, our example project, we need to rent a 600 millimeter lens and a 16 to 35 millimeter lens plus a remote trigger set. And that's going to help us get the portraits that we have in mind. So that's three line items, each with their own cost. And let's go ahead and enter a fourth wine item for a contingency fund. And that's an additional amount, about 10% total of the rental costs. And that's going to cover any unexpected fees, insurance, ad-ons shipping, whatever it might be that is involved in the equipment rental that we weren't necessarily expecting. But now we've at least budgeted for the unexpected thing.
Now the next line item is going to be custom equipment because as every photographer knows, equipment needs don't stop at the camera gear, right? And for a wetland shoot, we might want a popup blind or we might need to DIY our own floating blind. So each piece of additional equipment right down to the nuts and the bolts used in building that floating blind get a item in the budget. So you want to research the costs of each piece and enter that amount. And again, add that line for a contingency fund. About 10% of the total expected costs for custom equipment should do it as a contingency fund line item.
So now we have equipment rental, we have custom equipment. What about labor? We need to include covering our own time that we've devoted to this project. And I recognize that this feels odd because aren't we just trying to, you know, do some good in the neighborhood? Well yeah we are. And a lot of people, especially when working on a passion project feel really guilty about taking payment for their contribution. You might be volunteering for your conservation photography project, but if you're doing any fundraising to cover costs, either crowdsourced or securing partnerships or applying for grants, you definitely want to factor in the cost of your labor because as conservation photographers, our labor is a value. It's worth investing in.
Plus often those who are investing in a project, so those sponsors or those patrons, they want to see the photographer compensated for their work. It adds a sense of professionalism and heightened level of quality to the whole project. So don't feel guilty about adding in a line item for your labor and don't skip this section, especially if you are fundraising to cover costs. And you can factor in this line item into a goal amount.
So for the labor section, I usually include an administrative day rate. So the time that I spend at the computer planning out the project, coordinating shoots, making connections to get access to areas, filing for permits, all that stuff that falls under an administrative day rate. Then there's a photography day rate for the days that I'm actively shooting out in the field. So this includes the time spent shooting as well as the time spent editing and processing images and also a deliverables creation day rate goes into the labor section. And that's the time that is spent at the computer designing, editing, and printing those deliverables. So if you are creating an exhibit or you're creating flyers to advertise that exhibit or whatever might be going into the actual things that you create, that can go under eight deliverables, creation day rate.
So again, under the labor section I have three line items. One is an administrative day rate, one is a photography day rate, and one is a deliverables creation day rate. And when you create your work breakdown, you'll figure out how much time you need for each of these line items. And when you know how much time you need, then you'll know how much to budget. So for our example project, let's say that our work breakdown specifies that we're going to spend four total administrative days spread out over the project. We're going to spend six total days out in the field shooting, and we're going to spend four total days creating, uh, prints and caption cards and flyers and donation sheets for the exhibit. So decide on a rate that feels really fair to you and add that in for each line item. So you'll take whatever rate feels fair and you'll multiply that by four for your administrative days. Multiply it by six for your shoot days and another, multiply it by four for your deliverables creation days.
All right, so now we have our equipment rental costs. We have our custom equipment costs, we have our labor costs. Now we're going to figure out what costs we're going to incur during our actual shoots. So for our example project, our shoe costs are pretty minimal. We want to add in line items for things like parking fees or gas or mileage and meals. But for a project that takes you on the road or in the back country for a shoot, you might actually have more inside of your budget. So let's dig into a little bit more about what you might have in your actual photography project budget. So some of the common line item costs include an assistant day rate, a guide day rate. So if you have to hire someone to actually guide you through an area, your lodging, your permits, add in, anything that you will have to cover during a shoot.
And repeat this if you're doing multiple shoots. So in our example, we're doing two, three-day shoots. So we're going to have a budget that has a section for Shoot A and all of its costs and a section for Shoot B and all of its costs. And this makes it way easier to track costs specific to each shoot, especially if the shoots have different tasks or goals that will incur different costs. So let's add into this example. Let's say that shoot a our first three day shoot that might be done with just us and our gear. We're just going to get portraits, we're going to head out, we're going to go into our pop-up blind and photograph with that 600 millimeter. Or we're going to set up a little remote camera and sit in a blind and trigger that camera and get our portraits.
But Shoot B's image goals...that requires us hiring a boat driver and renting time in a existing photo blind. And we also want to be able to utilize a drone, right? And so that might require a permit. So Shoot A's, line items are going to be different from Shoot B's line items. So do you see what I mean about keeping those separate? That's going to make it way easier to track everything in the long run. And don't forget that all important contingency fund for both. So whatever you figure is going to be your total cost for that shoot. Do a contingency fund of about 10% of that total cost. And then that way you have a little bit of a buffer. So let's say that on shoot B, you accidentally crashed the drone and you have to re rent it and head out again. Well you have a bit of a contingency fund that is going to help you cover the cost of either that crash drone or renting some equipment or something. It's just a really good little safety net to have for any oopsies.
So after you have the cost of actually doing the shoots, then you're going to dive into the cost of creating the stuff. So this is the deliverables and the distribution. This might come last, but it is certainly not least. This is where all the artifacts are, the actual things that you create. That's where the cost of creating those go, the actual physical things that come out of your project plus the cost of delivering the deliverables. So let's say for our example, we are doing an exhibit set up in the hallway at our state's Capitol building. So our costs are going to include things like uh, 15 prints that we want mounted on foam core and 15 display stands so that we can actually like set those up along the hallway. And we need cardstock for the caption cards. We need flyers to print to advertise the event around the city. We want to create brochures with donation sheets. So when people come into the exhibit and they're starting to walk down that hallway and check out the images, they have a donation sheet in hand that they can fill out and provide the friends of the wetland with a donation.
Now the template budget that I provide has an example of line items for other deliverables as well, such as a website or printed books to hand out to decision makers about maybe the preservation of that wetland or a multimedia production and all that stuff. There's all kinds of deliverables that you can build that are amazingly effective for conservation photography projects. No matter what it is though, you want to add that into this area of your budget, the deliverable, creation and distribution.
Now there's also costs of not just the things themselves, but in getting the exhibit set up. So the cost of gas or mileage for driving the prints over to the States, Capitol building or overnight lodging because there's going to be maybe a gala event to launch the exhibit. There's meals, there's parking fees, and can you guess what else? That contingency fund. So you want to add up everything that it's going to cost you to actually create the deliverables and deliver deliverables and you want to add in that contingency fund of course.
And when you're done with these sections, you'll add up the total and once you have that total, you're going to round up. You always round up because nothing ever comes out exact and it's better to budget high and come out under budget than the other way around. And once you have that number, your budget's done. That's it.
When you take the time to build out a budget, you save yourself so much time and headache on the road to completing a project and it really doesn't take much time. Let's figure two or three hours of your day for making lists and researching costs and then adding up those line items. It is not much of a time investment for ensuring something as hugely important as the success of your fundraiser exhibit event for friends of the wetland and anyone who is going to sponsor your project will want to see where their donation is going. So if you want to fundraise in order to cover the costs, you can actually have a budget that says this is exactly how I'm going to spend this money and it creates a huge amount of trust and any grant that you apply for is going to want this breakdown and even friends of the wetlands themselves might want to see the budget so they know exactly what you have in mind for the project. In other words, this is so worth it right now.
Let's review what those areas of the budget are one more time, and again you can download a template at JaymiH.com/25 and you'll be able to see these yourself but our areas of a photo project include equipment, rental, custom equipment, labor, photo shoots, deliverables and distribution. And that's really it. And then you can break each of those sections down to whatever amount of complexity or detail that you want. But ultimately these are the main areas of a budget that are going to completely change the way that you think about your project and how effectively and stress free. You can pull off that project.
And if you have any questions at all about building a budget or if you want help with a budget that you're trying to create, I would love to invite you to come in to my free Facebook group for conservation photographers. There is a link to join this group in the show notes. You are more than welcome to come into the group and ask questions about what other people have done for their photography project budgets or what you might want to do for years or how do you research the cost of certain things inside of this free Facebook group for conservation photographers. We are all about helping each other out and helping each other pull off projects. So again, you are welcome to hop in and ask any questions that you might have and I hope to see you in there.
And meanwhile, don't forget your template. It's at JaymiH.com/25 All right. I hope this was helpful. I hope to see you inside of that free Facebook group, and meanwhile, I'll talk to you next week.
Before we wrap up, I would love to ask you to do one quick thing. Subscribe to this podcast. As a subscriber, you'll not only know when each week's episode goes live, but you'll also get insider goodies, like bonus episodes. You might miss them unless you're subscribed and I don't want you to miss out on a thing, so please tap that subscribe button and I will talk to you next week.
________________
Impact: The Conservation Photography Podcast
JaymiHeimbuch.com/Podcast
